One of my favorite travel destinations is Portugal because
of its charming cities, friendly people, nice weather and awesome food. To
these reasons I must add that during my time in Madrid it was extremely easy
and cheap to fly to there with low cost airlines and that in total food and accommodation
(were) are inexpensive. I've been to Portugal a lot of times but I always enjoy
it by visiting things I didn't see before and trying new food or just by going
to the main touristic attractions and eating what I know is good. I also like
it because I've been there always with different people so every time is a
different experience.
 |
| Some of my Trips to Portugal // Algunos de mis Viajes por Portugal |
When you are Lisbon it’s a must to visit Belem to see its UNESCO
World Heritage Sites: the Belem Tower and the Jeronimos Monastery. If you’re
already there you must also go to the famous Pastéis de Belém shop and eat one (two or three) of these
delicious pastries, which are hand-crafted by master confectioners in secret
rooms following the ancient secret recipe that has remained unchanged since
1837. You can get similar pastries in almost any bakery in Portugal, but these
ones in Belem are supposed to be special.
As they have a secret recipe it seems to be impossible to
get real Pastéis de Belém unless
you’re in Lisbon and you take time to go to Belem and buy one. The other option
could be that you’re one of master confectioners that know the “secret” and
could be able to bake it somewhere else. This could be a problem if one day you
feel like having something that reminds you happy days in Portugal and you want
to have these sweets, but even if the recipe is a secret, there are ways to
make things that are kind of similar. And then you can have sweet Portuguese
memories.
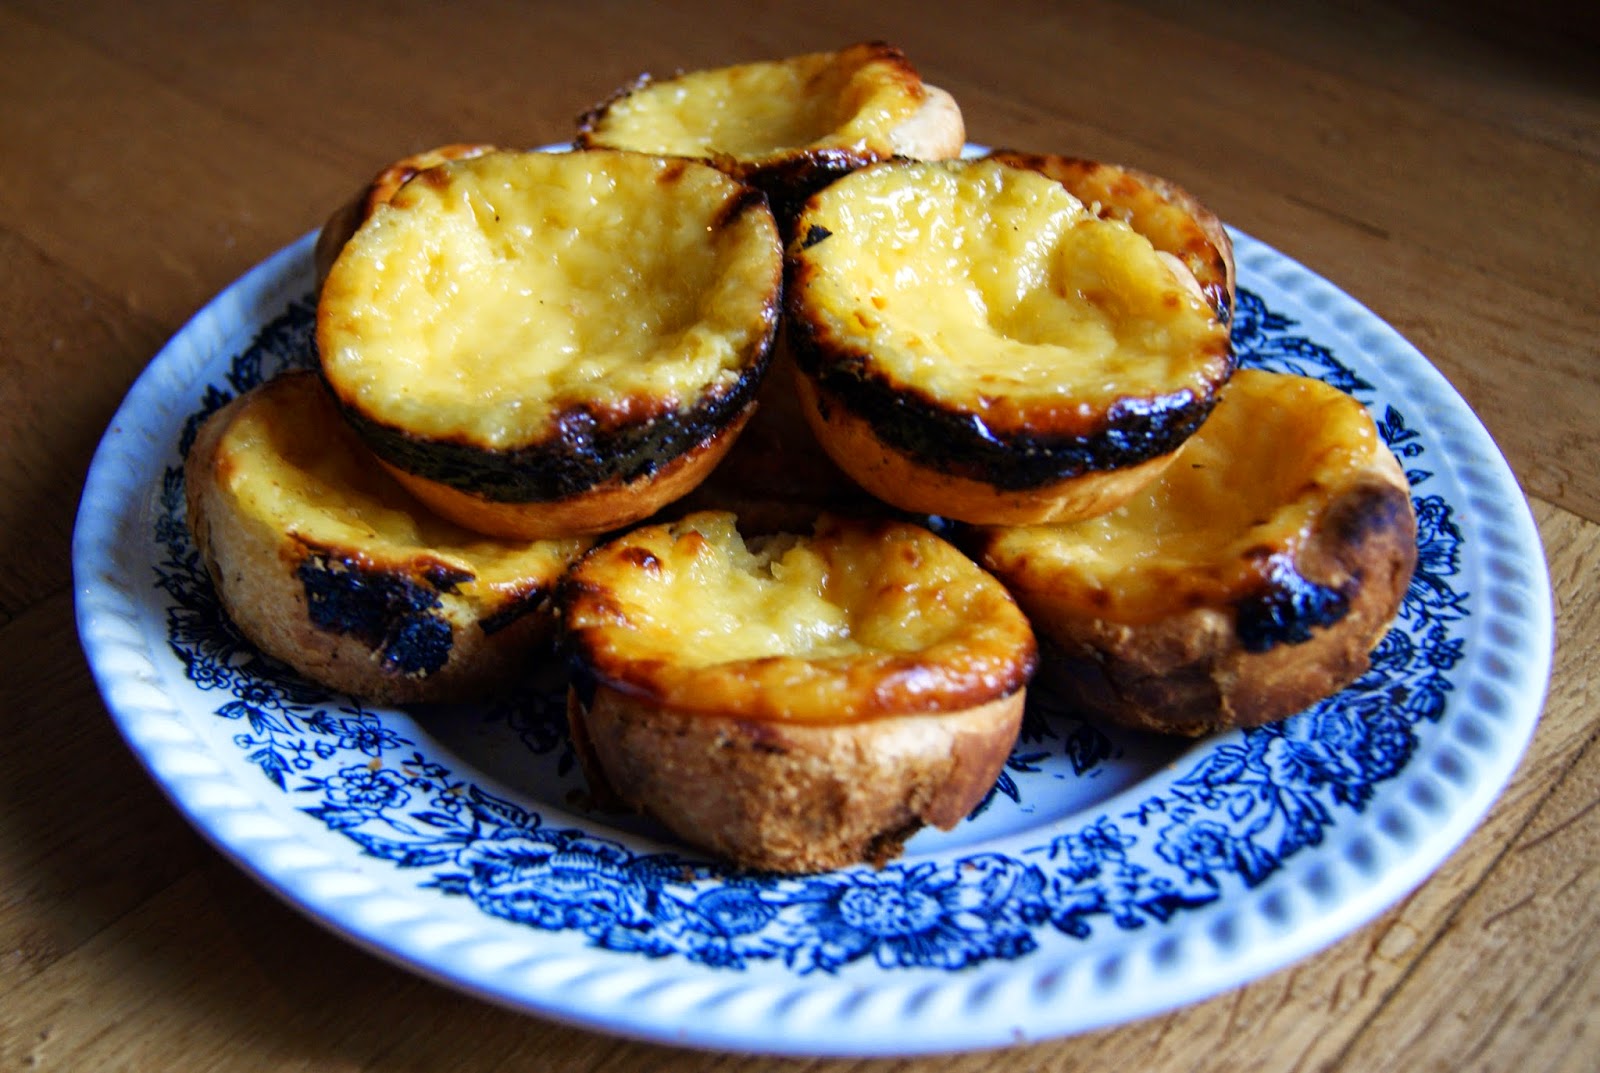
After checking different recipes, I baked these pastries
following these steps:
INGREDIENTS (for 18 pastries)
500 ml milk
190 g sugar
50 g flour
6 yolks
600 g puff pastry
½ lemon (the skin)
1 stick cinnamon
butter for the muffin tins
Prepare the muffin tins with butter. Roll the dough and cut
circles a bit bigger than the tins border. Line each tin with one circle and
try that the dough is a bit thicker in the borders of the tin. Let it rest for
some minutes.
Separate 100 ml of milk and mix very well with the flour. In
a sauce pan heat the rest of the milk with the lemon skin and the cinnamon. When
it boils add little by little the flour mix and don’t stop mixing. When it
boils again take the cinnamon and the lemon skin out of the pan. Add the sugar
and continue stirring. When it is well mixed, put it out of the heat and let it
rest for 10 minutes.
Separate the yolks. Whisk them up in a bowl. Using a
strainer add them to the cream. Mix it.
Preheat the oven to 220°C for 5 minutes.
Pour some cream in each tin trying that it stays bellow the
border of the dough.
Bake the pastries for 15 to 20 minutes. Cool them down and
enjoy them with cinnamon and powdered sugar.
 |
| The original Pastéis de Belém // Pastéis de Belém originales |
Uno de
mis destinos de viaje favoritos sin duda alguna es Portugal, por sus
encantadoras ciudades, su amable gente, su buen clima y su riquísima comida. A estas
razones tendría que agregar que durante mi tiempo en Madrid era demasiado fácil
y barato volar a varias ciudades portuguesas con las aerolíneas de bajo coste,
y que en general, la comida y el hospedaje ahí no son nada caros. Creo que he
estado en Portugal quizá demasiadas veces. Sin embargo siempre lo disfruto
visitando lugares no vistos antes y probando nuevas cosas o simplemente
haciendo las típicas cosas turísticas y comiendo lo que ya sé que está
buenísimo. La verdad es que me gusta porque siempre he ido con personas
distintas y así cada vez es una experiencia diferente.
 |
| Eating the origianl Pastéis de Belém in 2009 // Comiendo los Pastéis de Belém originales en 2009 |
Cuando
vas a Lisboa TIENES QUE (si quieres ser un buen turista, claro) visitar Belem para
ver sus Sitios Patrimonio de la Humanidad de la UNESCO: La Torre de Belem y el
Monasterio de los Jerónimos. Si ya estás ahí, definitivamente tienes que ir a
la famosa tienda de “Pastéis de Belém. Ahí
podrás por muy pocos euros probar estas delicias e incluso tomar una bebida
para acompañarlas. Los pasteles de Belem son producidos por maestros pasteleros
en talleres secretos siguiendo una receta que no ha cambiado desde 1837. Puedes
encontrar pastelitos similares en casi cualquier panadería en Portugal, pero
los de Belem se supone son especiales.
Al ser
una receta secreta la de los Pasteles de Belem sería imposible conseguir uno a
menos que estés en Lisboa y te tomes el tiempo de ir a comprar uno a Belem. La
otra opción sería que fueras un maestro pastelero, de esos que conoce la
receta, y así poder prepararla en cualquier lugar del mundo. Esto podría ser un
problema si un día te sientes con ganas de algo que te traiga felices recuerdos
de Portugal y sientes la necesidad de tener uno de estos pastelitos. Pero
aunque la receta sea secreta, siempre se pueden hacer cosas similares y así
tener dulces recuerdos portugueses.
Después
de mirar varias recetas, los hice siguiendo los siguientes pasos:
INGREDIENTES (para 18 pasteles)
500 ml
leche
190 g azúcar
50 g harina
6 yemas
600 g hojaldre
½ limón (la piel)
1 palo de canela
Mantequilla para los moldes de muffins
Preparar
los moldes con mantequilla. Extender la masa y cortar círculos un poco más
grandes que los moldes. Colocar un círculo en cada molde y tratar de que la
masa sea un poco más gruesa en las orillas. Dejar reposar por unos
minutos.
Separar
100 ml de leche y mezclarla con la harina. En una olla calentar el resto de la
leche con la piel de limón y la canela. Cuando hierva ir agregando poco a poco
la mezcla de harina sin parar de revolver. Al segundo hervor retirar la canela
y la piel del limón. Agregar azúcar y mezclar. Cuando todo esté bien mezclado
retirar del fuego y dejar reposar unos 10 minutos.
Separar
las yemas y batirlas un poco. Usar un colador para agregarlas a la crema y
mezclar.
Precalentar
el horno a 220°C por 5 minutos.
Rellenar
los moldes con la crema cuidando de que no rebase el borde de la masa.
Hornear
los pastelitos de 15 a 20 minutos. Dejarlos enfriar y disfrutarlos con azúcar
glass y canela en polvo.